July 17, 2020

O365 e-Discovery

Office 365 e-Discovery

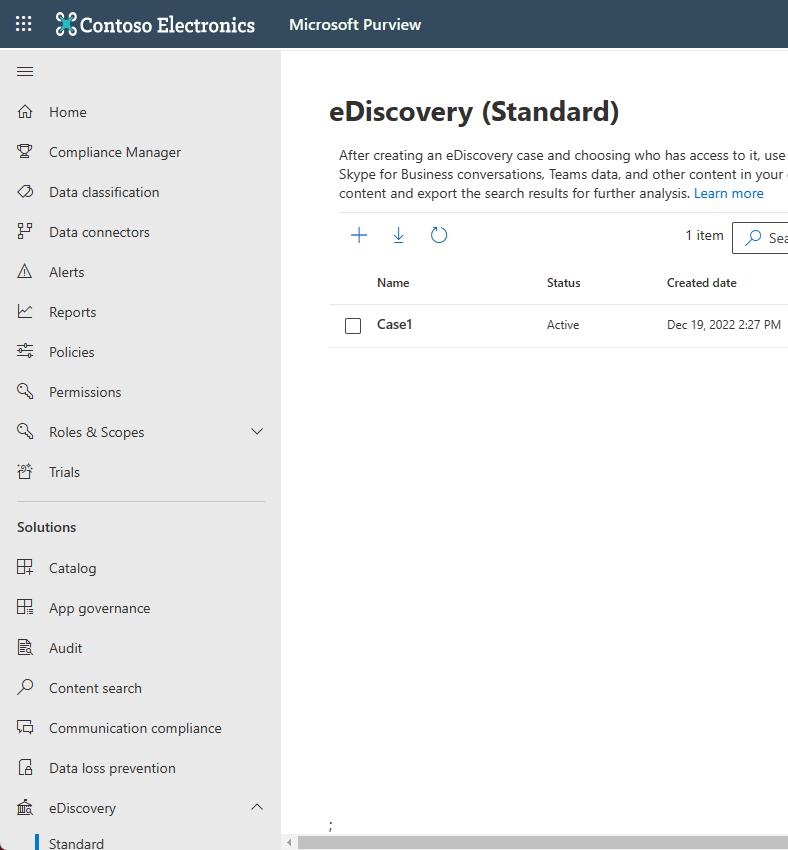
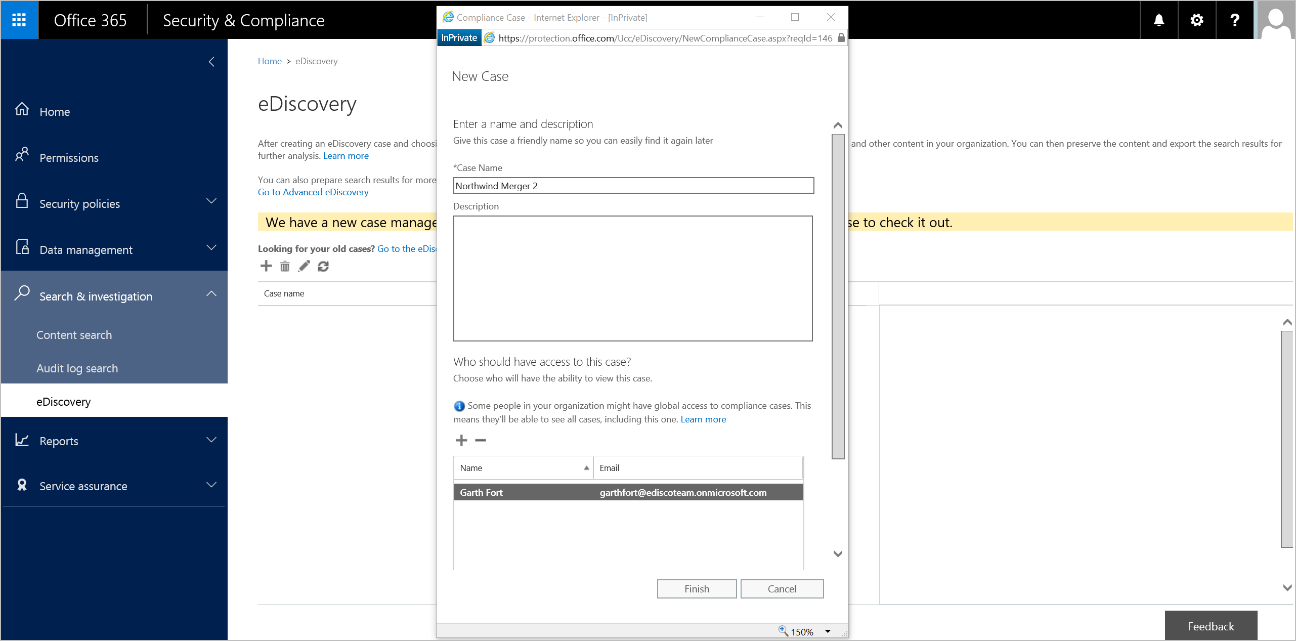
Office 365 has some really nice capabilities now, one of which is eDiscovery where you can place legal holds on mailboxes, OneDrive accounts.


https://protection.office.com


New enhancements to Office 365 eDiscovery further simplify the ...


1. How to place a mailbox on legal hold in Office 365

a) Open the Office 365 exchange admin console

b) Under resources, select user mailboxes, select the user who will be placed on legal hold.

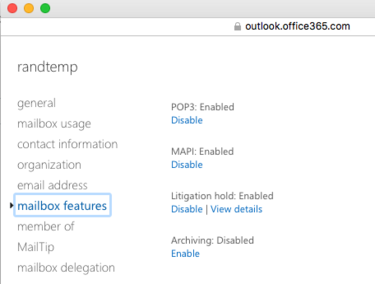
c) Click on Mailbox Features and scroll down to "Litigation Hold" and select "Enable". Click Save.


Doing eDiscovery, Litigation Hold, and Addressing Journaling in ...


2. How to place OneDrive on legal hold.

a)


Place a Microsoft Teams user or team on legal hold - Microsoft ...


July 15, 2020

O365 and security


Office 365 VS Microsoft 365: Demystifying Microsoft's Productivity ...


One of the best things about office 365 is the ability to control Legal holds e-discovery searches in one place.


https://protection.office.com

Will open the Office 365 Security and Compliance page at your firm after authenticating.


March 2, 2019

Office 365 Scripts


Let's get into our favorite Office 365 Powershell scripts.

I am going to refer to our good friends at Microsoft here as they have the best gallery of O365 Powershell scripts for admins and engineers alike.

https://gallery.technet.microsoft.com/office365 (I have this bookmarked).

NB: If you do download any of these, I do recommend you test them in a test environment first and not the production environment (just best practice caution).

Also if you do benefit from any script below, please make sure you give back to the Microsoft community by giving the script a rating. Thank you for all those who contribute powershell scripts to the MS community. Many of these scripts are written by well known Microsoft MVP's. How many do you recognize?

1: Office 365 reporting tool

This is the godfather of all scripts. It is a super script that generates 600+ GUI reports. All configurable to your discretion. If you would like to have a full birds eye view of your O365 environment including Azure, this script is will provide high level down to mailbox level reporting. Below are some of the reports you can generate with this tool.

Supported Services:

  • Azure Active Directory (43 reports) 
  • Security Reports (22 Reports)
  • Exchange Online (99 reports) 
  • SharePoint Online (35 reports) 
  • OneDrive for Business  (11 reports) 
  • Skype for Business (22 reports) 
  • Yammer (20 reports) 
  • Microsoft Teams (16 reports) 
  • General Office 365 Reports (9 reports)
https://gallery.technet.microsoft.com/office365/Office-365-Reporting-Tool-7987b4c2 

2: Office 365 Auditing report tool

Another powerful GUI report all segregated into the different O365 apps.

  •  Azure Active Directory (66 reports)
  •  Exchange Online Auditing (56 reports)
  •  SharePoint Online Auditing (57 reports)
  •  OneDrive Business Auditing (27 reports)
  •  Teams Auditing (8 reports)
  •  Power BI Auditing (23 reports)
  •  Office 365 Secure Score Reports: (62 Reports)
  •  General Auditing (12 reports)
https://gallery.technet.microsoft.com/office365/Office-365-Auditing-Tool-01747cd4


3: Get-DistributionGroupMembers.ps1

Much like its counterpart for Exchange 2010 this script will export to CSV all the Distribution Groups and its distribution group members. This can be handy when there are nested distribution groups and you want to run a report of Distribution groups that may be accessible externally (from the internet).

https://gallery.technet.microsoft.com/office365/List-all-Users-Distribution-7f2013b2 

4: MailboxSizeReport.ps1

Mailbox Size report. This report can be exported to csv and configured to display all necessary outputs. Keep checking back this one as its regularly updated with features and fixes.

https://gallery.technet.microsoft.com/office365/Mailbox-Size-Report-for-ed9435e2 

5: O365 Mail Traffic Statistics by User

This script retrieves the inbound and outbound mail traffic statistics by recipient for all available dates. It can be exported to a CSV file.

Handy when troubleshooting mailbox flow issues and possible Inbox rule interference.

Output example:

DateRecipientInboundOutboundInboundSizeOutboundSize
03/02/2014admin@cogmotive.com1093080
04/02/2014admin@cogmotive.com526993919861
04/02/2014brian@cogmotive.com0105897
04/02/2014garthf@cogmotive.com1058970


https://gallery.technet.microsoft.com/office365/Office-365-Mail-Traffic-afa37da1 

6: O365 Admin Role Groups membership report

This script produces a csv file of all the members of the admin role groups.


https://gallery.technet.microsoft.com/office365/Office-365-Role-Groups-b1eb6c6a

7: Bulk Add SMTP addresses to O365 mailboxes.

Not a usual request, however it has come up before to add additional SMTP addresses to entire firms mailboxes, or a new domain. Always a handy script to have up your sleeve.


https://gallery.technet.microsoft.com/office365/Bulk-Add-SMTP-Addresses-to-e3d28842

8: EAS troubleshooting script

Troubleshoot Exchange ActiveSync device problems. This script will collect relevant mailbox information related to Exchange Active Sync and troubleshooting areas.

https://gallery.technet.microsoft.com/office365/Exchange-ActiveSync-fb265f94

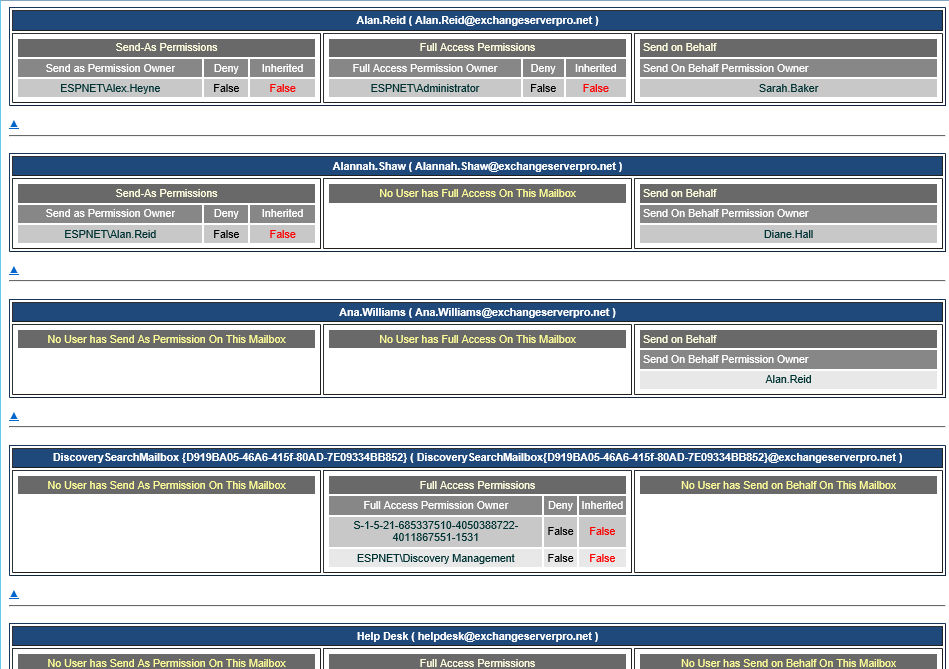
9: Generate HTML report for mailboxes

Syntax for single mailbox: 

.\Report-MailboxPermissions.ps1  -Mailbox <user@domain.com> -HTMLReport C:\Temp\<user>.html

Syntax for database:

.\Report-MailboxPermissions.ps1  -Database DB1  -HTMLReport C:\Temp\DB1.html


Syntax for all mailboxes:

.\Report-MailboxPermissions.ps1  -HTMLReport C:\Temp\ALL.html

PowerShell Scripts for your Exchange Server Toolkit


December 31, 2016

Exchange 2010 Reports

Recently I have been running a number of reports consistently for an overall view of the Exchange environment.

These are my top 4 favorite reports which are all available for download on Microsofts tech net:


E2K10_Architecture_GUI_V2.02.ps1
Get-ExchangeEnvironmentReport.ps1
Get-PublicFolderReplicationReport.ps1
Active Directory topology Diagrammer - ADTD.net setup.msi

1.    Exchange Architecture Report

·       Run this from an Exchange server with administrator level permissions. The script will produce an HTML report.
·       Open Powershell for Exchange, run the powershell script below:
·       .\E2K10_Architecture_GUI_V2.02.ps1
·       This needs the Exchange extest account to run completely. This can be created by running New-TestCASConnectivityUser.ps1 from $exscripts.
·       This runs a GUI. Check “Select All” 
·       Number of jobs, select 2-6. Selecting a lower number will run slower but it will less likely impact performance this way.
·       Click Execute.
Download from: https://gallery.technet.microsoft.com/office/Exchange-2010-Architecture-9368ff56 

2.    Exchange Environment report


·       Run this from an Exchange server with administrator level permissions. The script will produce an HTML report.
·       Open Powershell for Exchange, run the powershell script syntax below:
·       .\Get-ExchangeEnvironmentReport.ps1 -HTMLReport c:\Get-ExchangeEnvironmentReport.html

Download from: https://gallery.technet.microsoft.com/scriptcenter/Generate-Exchange-2388e7c9

3.    Public Folder replication report

·       Run this from an Exchange server with administrator level permissions. The script will product an HTML report.
·       Open Powershell for Exchange, and run the powershell script syntax below:
·       .\Get-PublicFolderReplicationReport.ps1 -FileName "PublicFolderReplicationReport.html"
      Download from: https://gallery.technet.microsoft.com/office/Exchange-2010-Public-315ea9aa 

4.    Active Directory Topology Diagrammer

·       Run this on a workstation with Visio (minimum 2003) installed. Do not run on a production Exchange server.

·       Run ADTN.net setup.msi with elevated rights such as admin account
     Download from: https://www.microsoft.com/en-us/download/details.aspx?id=13380


February 23, 2015

Setting up Microsoft Office 365 for a small business.

Office 365, its the latest and greatest way to have an email backend without installing an exchange server.

Not every business requires a full exchange deployment. Some small businesses can benefit from hosted email and use of Lync chat complete with website and domain through the use of Microsoft hosted Office 365. It is, in my opinion, a fantastic solution for a small fee ($5 per month for the most basic setup of 1 mailbox).

If you haven't already bought your domain name yet, start now. 
There are many domain name registers out there, I'd steer clear of the uber-cheap ones. I've seen multiple unnecessary downtime and loss of email functionality due to ultra-sensitive block lists. If your business is important enough to avoid downtime, I would suggest Network Solutions. It's easy to follow and hassle free and they've been around for a reputable amount of time: http://networksolutions.com

Now start by signing up to Office 365 here:
https://products.office.com/en-us/business/Office

If its for a small bussiness, sign up here:
https://products.office.com/en-us/business/compare-office-365-for-business-plans


Set Up:

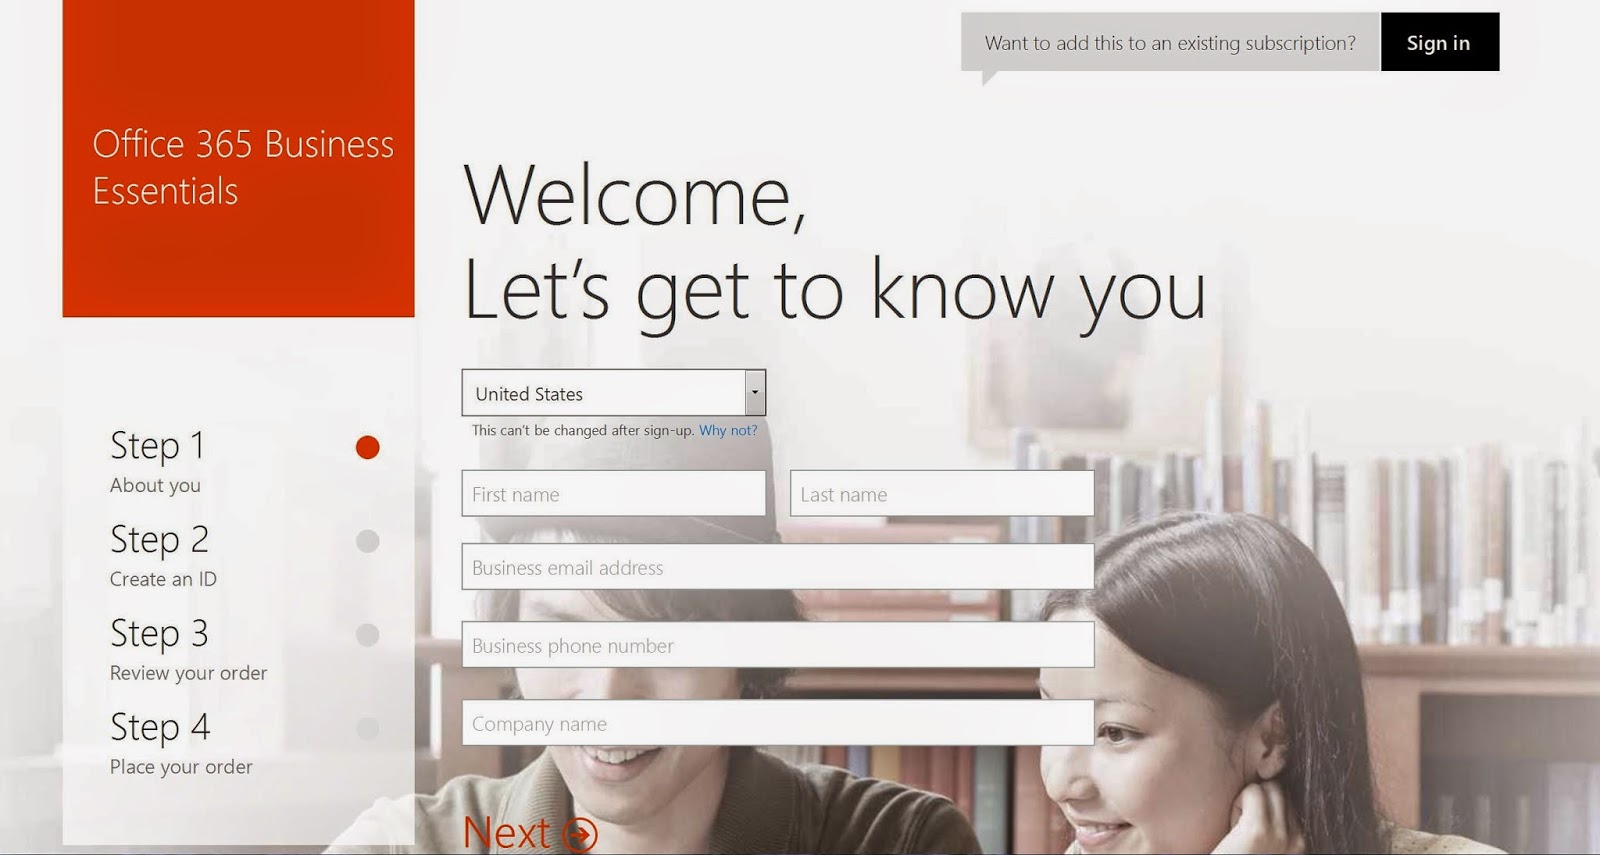
Expect to see the following screen upon sign up. Fill in all the details appropriate to the business.


When you have completed sign up and payment, you are ready to begin with the setup. You should be able to see something like this below upon signing in for the first time.


  If you have to log in from the beginning again it will look like this. Put in your login details that you just set up and click sign in.


  You will be welcomed with a screen, click on ADMIN. You will be brought to the dashboard, the command center


Next Step: Configuration
It is now time to configure your Office 365 DNS settings to point your domain to your email.

Simultaneously, sign into your domain website (in my case its Network Associates) as well as your Office 365 setup (at this stage you will be prompted to set up the DNS settings.


 At this step, go to your domain providor (in this case NetWork Solutions) and add the TXT value (MS=ms25498382).
As below in Network Solutions website, click on "Edit Advanced DNS Records" in the red box below to access the TXT record section to add.


Click on "Edit A records" button below and you will be editing the record listed below with the Host "@ (None)"


Change the Text field to "MS=ms25498382" and the TTL to 3600, click Save.


Go back to the Office 365 website and verify that you made this change. This can take 1 or 2 minutes so if it tells you its not recognised, try again in 1 minute. You will reach the following screen if successful. Click Next.


At the next screen, you will be at Step 2, this is very easy. You can add 1 user and it will append the domain as the email address. For example:
user: admin
email address will be: admin@yourdomain.com

To add a second user, it will probably cost another $5, so be mindful of what you want to do here. For now, we will just stick with admin as its a common email account to have.

NB: For your user, you can add other email addresses that you wish to receive email on such as info@yourdomain.com, admin@yourdomain.com, webmaster@yourdomain.com, this way you can receive emails but send from the 1 designated email such as admin@yourdomain.com.

Step 3: Domain setup.
At step 3 click next.


The list of DNS entries to change on (in this case Network Solutions website) will only take a few minutes. Start with the MX Record , then change the 4 CNAME records, TXT record
(yes the one you changed earlier will have to be changed again), and finally the 2 SRV records.
It will take up to 10 minutes for the changes to register once your click Save.


On your Network Solutions account change these carefully one by one making sure you copy and paste into the correct fields.

TXT records

CNAME records

Finally your updates should look something like this in (Network Solutions), click Save for each one:


When complete, in office 365, click the "Ok I've added the records" button and check for any errors to repair. Dont forget that although you may have added the record to (Network Solutions), it may not be updated yet, just wait up to 10 minutes and com back and click the "Ok I've added the records" button. You should have all records with a green check mark next to them.


Click Finish. Your set up is complete and you are now Administrator of your Messaging environment from one simple location.

Head back to the dashboard in office 365. Here you can manage everything from adding users, accounts, checking the health status of your Exchange, Lync, Sharepoint, Yammer service. As you can see from the list, you can add shared mailboxes, add contacts (even import tham), create groups and add more domains.


When it comes to adding another domain, for example a domain for a blog or website or even another business, you will need to follow through steps 1-3 again. However, it is pretty simple and the only time consuming issue will be to wait for DNS records to update before progressing through the set up.

Next step, test your new email.

Click on the blue button in the top left hand corner for all your applications. Click on Outlook.


In your account, start sending yourself some emails from an external source.


You are now set up and ready for business.
For future reference. This is where to log into Office 365 from your PC:


Network Solutions, also provides simple and concise explanation of technical terms as you progress through the process of updating the records one by one:


What is Advanced DNS?
Advanced DNS allows you to manage your DNS records (A, MX, CNAME, TXT and SRV Records) for individual services, such as changing IP addresses, or modifying an email delivery address. 
Choose this option if you want to use this domain with some Network Solutions® services and some non-Network Solutions services. For example, you might continue to use Network Solutions email, but host your website elsewhere. Or, you can keep your Network Solutions website, but use a different provider for email.
Only advanced users should make updates to their Advanced DNS Manager.
What is an IP Address?
An Internet Protocol (IP) address is a unique number which identifies a computer and its location on the Internet. Your IP address is used to transmit data from a website to your computer. 
What is a Mail Server (MX Record)?
MX ("Mail eXchange") records are used to determine the delivery route for your e-mail. For example, if you want to host your own mail server for the domain in your account, you must specify the mail server names as MX records. In addition, you can specify multiple mail servers and rank them by priority to respond in the event the primary mail server is not responding. 
What is a Host Alias (CNAME Record)?
Canonical Name (CNAME) records allow you to create alias names that correspond to existing Internet host records. CNAME records are helpful when pointing multiple domain names to the same host. 
What is a Text (TXT) Record?
TXT records have several functions. One common function is to use the TXT record to create an SPF. SPF records help to stop email spammers from forging the "From" fields in an e-mail. It allows the owner of a domain to designate the IP address that can be used to send email from that domain. 
What is a Service (SRV) Record?
An SRV Record allows a user to locate a specific service on a network rather than a specific machine. The service could be a printer, VOip, FTP, or other similar services. 


What is DNSSEC?
DNSSEC is a technology that adds authentication to DNS query responses, it does not provide encryption. It is based on PKI technology and involves forming a chain of trust from the parent of a delegation to the child. This chain can be followed all the way back to the root-zone and the widely distributed root zone public key. Authenticating this chain enables an end user to verify that the answer they got from the DNS is the answer intended by the owner of that domain name. 


This is where to log into Office 365 from your PC:
https://portal.office.com
Handy References: Don't lose access to your account. Enable self-service password reset for administrators.   
http://technet.microsoft.com/en-us/library/dn510386.aspx

NB: Alternatively, you can reach out to me directly on admin@exchangegloves.com with any questions, if you want this entirely handled by my company you can reach out to me on admin@claritagroupconsulting.com